live life, celebrate food, share both with those you love

Monday, 13 August 2012

Apron strings and pretty things...

Ever since the voluptuous Nigella Lawson bounded onto our television screens, a certain 'goddess within' mentality has blossomed in the food world. Even those who don't enjoy cooking, will now strive to have the prettiest kitchen things... including yours truly!

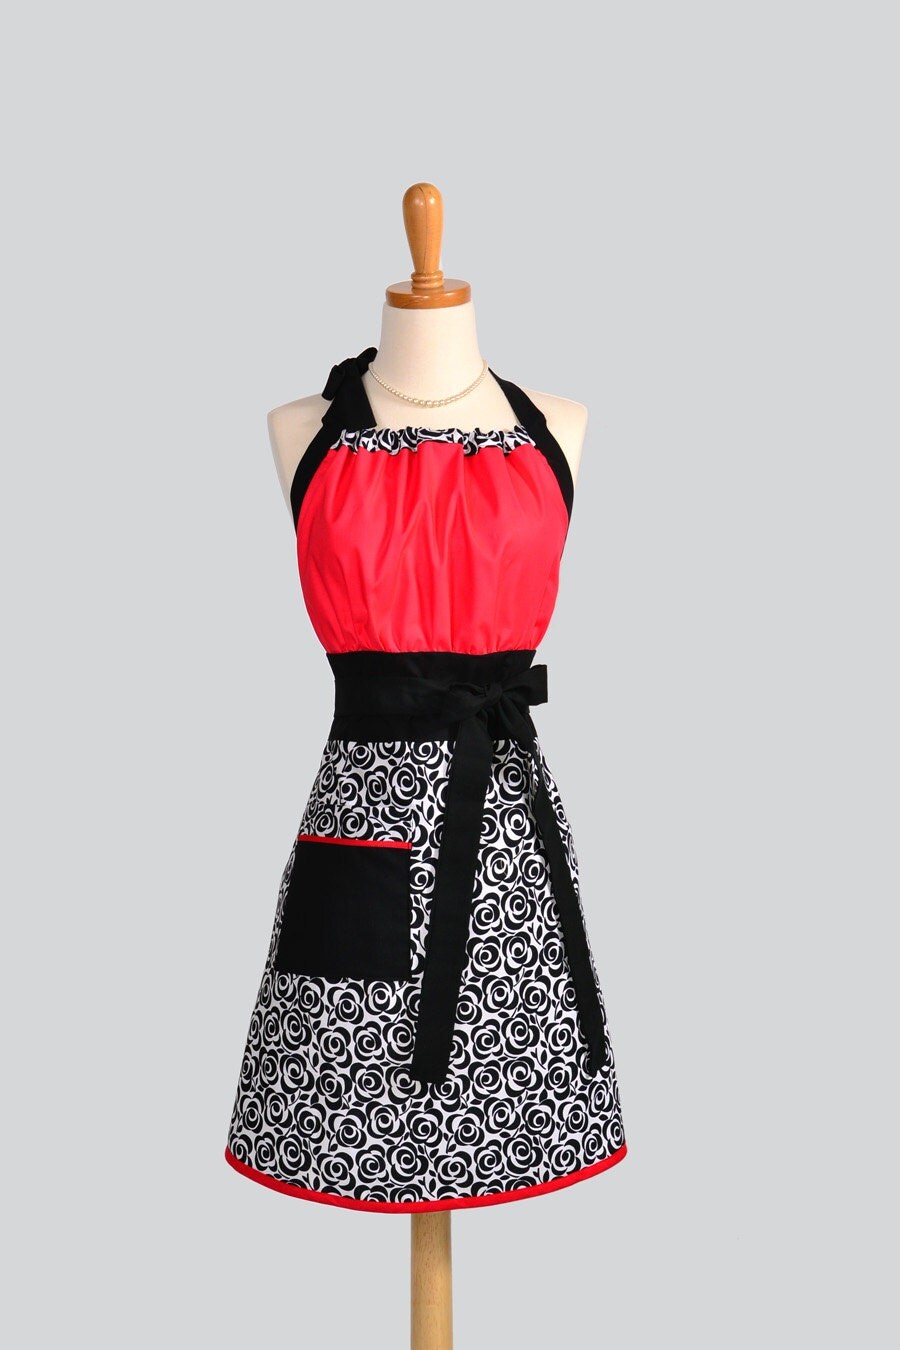
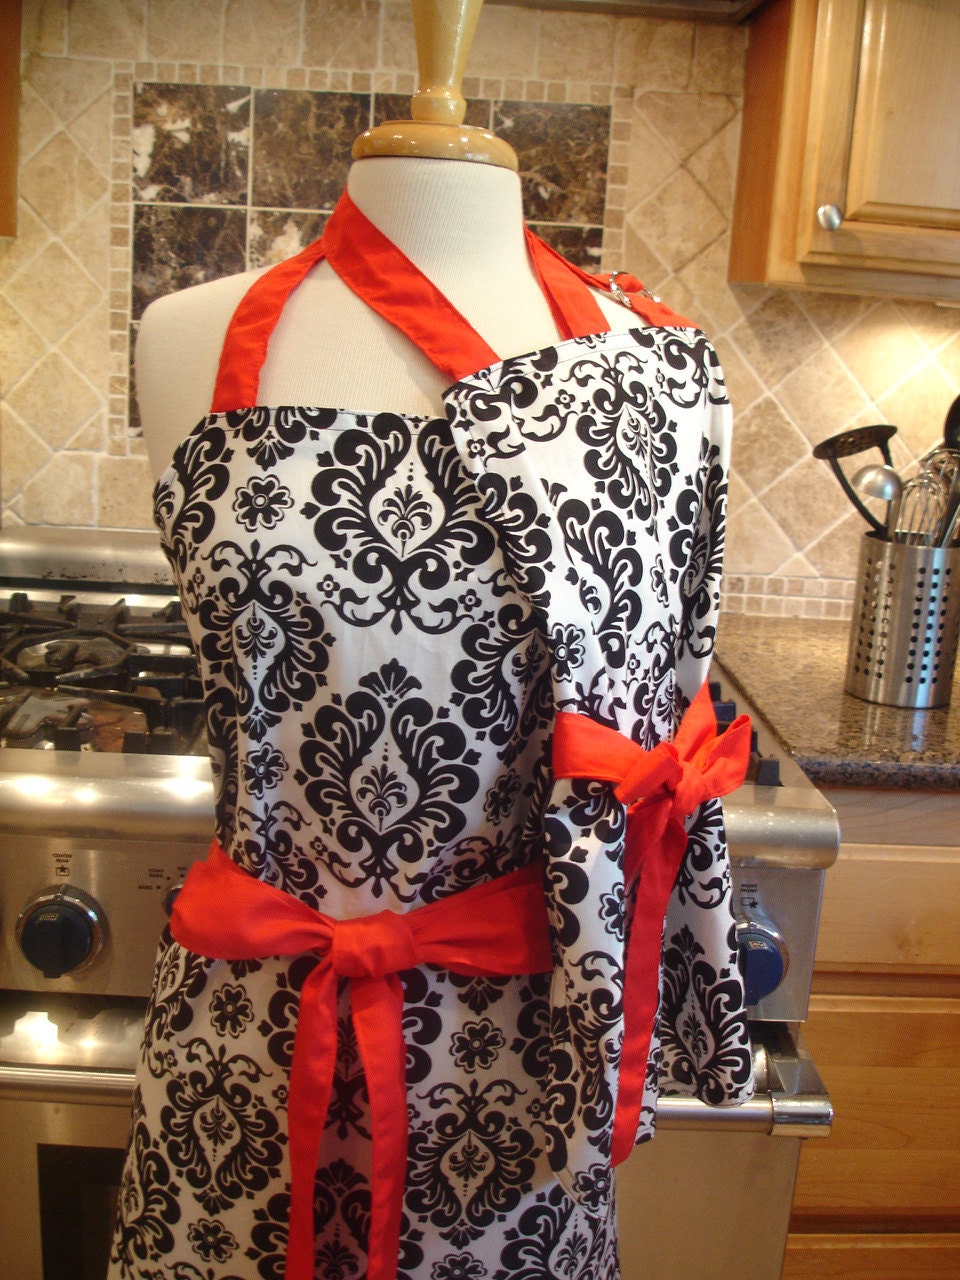
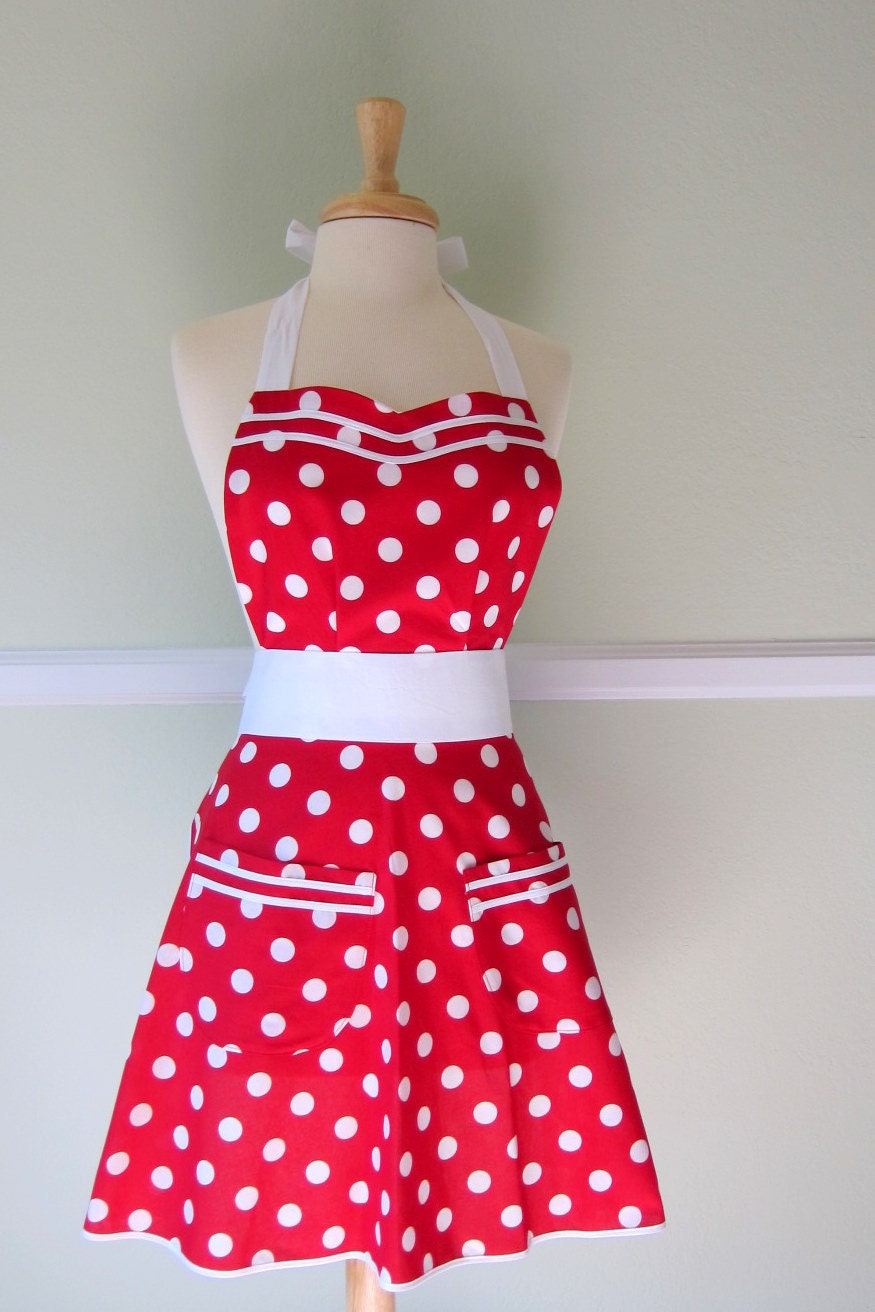
The latest must have item... a truly unique apron! Squeal!!! Here are the four contenders, how will you vote?

a) sassy ruffles?
b) cute kitsch?
c) mummy and me matching set?
d) retro polka dots?

Leave your suggestions below!
http://www.etsy.com/listing/92571582/sassy-ruffles-apron-red-black-white-dots
http://www.etsy.com/listing/104300820/cute-kitsch-apron-white-with-black-roses
http://www.etsy.com/listing/88597246/mommy-and-me-retro-apron-set-mother

Tuesday, 3 July 2012

Sticky Date Cupcakes

I love a good sticky date 'pud', but sometimes I find they are a little heavy and not very friendly to the old waistline. So here's a lovely, simple, lighter version... more of a cupcake then a pudding... but just as delicious!

Ingredients
1 1/4c pitted dates
1 1/4 water, boiling hot
1 tsp bi-carb soda
50g butter, melted
1/2 c brown sugar
2 eggs, lightly beaten
1 c self raising flour

How to...
- Preheat oven to 180 degrees C
- Grease a standard muffin tin, or line with paper cases.
- Place the dates and water in a food processor (or a powerful blender, see note) and whizz until smooth.
- Pour mixture into a mixing bowl, stir in bi-carb soda and let sit for 5 minutes. The mix will foam up a little.
- Stir in the butter and brown sugar, until smooth. 
- Add the eggs and flour and stir until combined and smooth.
- Pour the batter into the muffin tin and bake for 30-35 minutes or until cakes spring back when touched.
- Let stand for 5 minutes in the tin, then transfer to a wire rack to cool.
- You could make a caramel sauce to pour over but I find a dust of icing sugar and a little scoop of ice cream is a sure winner!

Note: be very careful when using a processor or blender to whizz up anything hot. The trapped steam can force the lid off once the blades start spinning, sending the ultra hot contents all over you! I use a Kitchen Aid blender and I've never had this problem but this has happened to me with less powerful blenders. PLEASE use the pulse button first to see if the lid will stay put.

Monday, 18 June 2012

My Thai Chicken Curry

My sister was recently visiting from the US and as anyone with international guests knows, at some point you will land up cooking for an army of people! My family, plus the in-laws, meant I was cooking for 12 people one night including 5 adult men who eat like it's there last meal... you know who you are!!

When you have a bunch of mouths to feed, you have to cook one big pot of something that everyone will enjoy, but I like to add a heap of condiments so everyone can alter their bowl to their preference. I think it makes the meal a bit more fun, especially for the little kiddies!
Too many choices, Mama!
So here's my award winning Yellow Thai Chicken Meatball Curry as enjoyed by little people, 3 yrs old, all the way to Great Grand people - 94 yrs old and still kicking! (By award winning, I mean every bowl was practically licked clean, that's the biggest compliment for any cook in my book!)

Ingredients
mmmm, saucy!
500gr chicken mince
1 egg, lightly beaten
1 small onion, finely diced
Handful of dry breadcrumbs (I use cornflake crumbs)
Small handful of chopped coriander or parsley
Salt and pepper
Jar of Yellow Curry Paste (I use Valcom brand)
400ml can of coconut milk or cream, whichever you prefer
100-200ml of chicken stock, optional
2 tbsp fish sauce
1 tbsp sugar
Serve with rice

Condiments - this is optional but it makes this meal so much fun! Put everything in little bowls and let everyone help themselves to their favorites:
grated carrots, beansprouts, corn, finely sliced spring onions, coriander leaves, sliced chillies, roasted cashews, finely sliced snowpeas, lime wedges.

How to...
- Preheat oven to 180 degrees C
- Cook your rice according to the packet instructions.
- Mix the chicken mince with the beaten egg, onion, crumbs, herbs and a good pinch of salt and pepper.
- Heat a little oil in a frypan over medium heat.
- Roll a tablespoon of the mince mixture in your hands to make a meatball.
- Gently drop the meatballs into the hot pan and fry off so the balls are golden brown all over. Don't worry about the meatballs being raw in the middle, we'll finish the cooking in the oven.
- Scoop the golden meatballs into an ovenproof dish. Once they are all golden, pop them in the oven to finish cooking for 10 minutes. (Break one open to check they are cooked)
- While the meatballs are cooking, get your condiments ready and take to the table.
- Heat the frypan again on a medium low heat and fry off 4-5 tbsps of the curry paste until fragrant. You have to cook the paste as the ingredients are raw. And don't overheat the pan or the paste will spit.
- Once fragrant, add the coconut milk, fish sauce and sugar. Add as much stock as you like to make more sauce. This is optional but I add the stock as it cuts through the heaviness off the coconut - good tip for anyone watching their weight too.
- Add the meatballs to the sauce and you're done!

This recipe feeds four, but you can easily make more or less depending on your crowd. This also freezes really well if you want to make in advance.

Mama's bowl, yum yum!

Thursday, 17 May 2012

Pea and Ham soup

It's SO cold in Melbourne! Yes, I'm constantly complaining about the cold because, as you've probably guessed, I don't like cold weather :( but I do love cold weather food! Soups, stews, bakes, bring it on!

I've always been intrigued by Pea and Ham soup but have never been brave enough to try it. The few times I have seen it served, it hasn't looked the best. But I do love peas... and ham.... and green food! My favorite milkshake as a kid? Lime! I know, I'm weird!

Anyway, here's my super easy attempt at this good ole staple soup. It's super easy but it does take a little time. Great to make on a lazy afternoon.
 
Enjoy!
 
Ingredients
20g butter
1 onion, chopped
2 garlic cloves, chopped
1 ham hocks (800gm approx)
400g dried green split peas
1 1/2c frozen baby green peas

How to...
- Melt butter in a large saucepan over low-medium heat.
- Add onion and garlic and sauté (don't brown) until tender, approx 10 minutes.
- Add ham hock, cover with cold water (about 2 litres), bring to the boil, then reduce heat to low and cook until ham is falling from the bone, about 1½ hours.
- Remove hocks from saucepan and set aside to cool.
- Add split green peas to stock and simmer until very tender, about 1 hour.
- Remove the skin and bone from the cooled hock and discard. Coarsely shred the meat and set aside.
- Add baby peas and simmer until bright green, 1-2 minutes.
- Purée in batches in a blender until smooth. Be careful as some of the less powerful blenders will pop their lid from the build up of steam. If in doubt use a handheld stick blender instead.
- Finally, add shredded ham to soup, season with salt and pepper and serve with crusty bread!

Wednesday, 25 April 2012

1, 2, 3... Scones!

Winter has well and truly hit in soggy ole Melbourne! What better way to warm up then with a lovely cup of tea and some hot from the oven scones, mmmmmm! With jam and cream of course :)
Hot tea and scones! Perfect winter fare :D
My mother in law makes fabulous scones and she's always happy to whip them up when requested. She even brought them to me in the hospital when I gave birth to my daughter. What most people don't know is... it's my recipe! Want to know my secret to fluffy, hot, delectable scones? It's easy! 1, 2, 3...


Ingredients
1 c lemonade
2 c pouring cream (light cream works just as well)
3 c self raising flour

How to...
- Preheat your oven to 200 degrees celcius.
- Clean your kitchen bench, you'll need to knead the dough in a moment.
- Grab a cookie tray and dust with a little plain flour, this will keep the scones from sticking. Also dust the bench with a little flour.
- In a bowl mix the flour, lemonade and cream to form a sticky dough. Note - if your flour is a little old, add 1 tsp of baking powder to help the scones stay fluffy. (definitely do this if you don't remember when you bought the flour... you know who you are!)
- Tip the sticky dough onto your floured bench, then flour your hands.
- Give the dough a quick knead for about a minute. This means that you fold the dough over and gently squash it back together, you can't get this wrong, don't worry.
- Shape the dough into a rectangular shape and cut it into 12 even pieces with a blunt knife.
- Place the pieces onto the cookie sheet and space about 2cms (1 inch) apart, they will spread but it's traditional to let them invade each others space so you can pull them apart. (see pic)
- Bake for 20 mins until golden brown.
- Serve with strawberry jam or lemon butter and thick or whipped cream!
- Makes 12 scones but you can easily halve or double the quantity if you like.
Easy recipe to halve!

Thursday, 19 April 2012

Mexiday! Orange and chipotle chicken tacos

Believe it or not, we have tacos for dinner once a week. Boring, right? WRONG! I guarantee we never eat the same tacos twice! This is mostly due to the way I cook as I like to throw together a little bit of this and a little bit of that. But that's not how most people cook, so I'll try to document some of my more popular concoctions.

These orange and chipotle chicken tacos are especially quick and easy and popular with little tummies too. If you can't find Chipotle, you could use smoked paprika instead.

500gr chicken breasts, sliced into strips
1 c orange juice
1 tsp chipotle powder or 1 whole chipotle chilli (or more or less to taste)
1 tsp coriander powder
1 tbsp honey

- Mix together the juice, chipotle, coriander and honey together. If you are using a whole chilli, blend the ingredients together to make up the marinade.
- Marinate the chicken for at least 20 minutes in the refrigerator.
- While the chicken is marinating, get your fillings organized - our favorites for these tacos is my Tomato and Corn Pico de Gallo and Greek style yoghurt. Don't forget to get your tortillas or taco shells ready too.
- Heat a frypan on medium flame.
- Drain the chicken from the marinade and cook in batches until cooked through. (if you try to cook all the chicken in one go, it will stew and get tough)
- Once the chicken is cooked, pop it all back in the hot pan to warm through.
- Finally, take it to the table with your warm tortillas (or taco shells) and your favorite fillings so everyone can make their own. Mmmmm!

Thursday, 5 April 2012

Cupcake wars!

OMG, how awesome are cupcakes?! If you think cupcakes aren't the most delicious, little morsels of pure bliss, it's because you've only had BAD cupcakes! The cupcake wars of the last few years has churned out so many cheap, baked offsite, franchises causing most people to feel that it's normal to pay $4 for something that's dry and chewy.  No Melbourne, no! We deserve better... and I've found it!

Let me first bore you with a quick story to prove my self imposed cupcake judging ability. On a sunny day in April 2011, my hubby and I were holidaying in LA (as you do) with our wonderful cousins. Whilst we were venturing down Rodeo Drive in Bev Hills - that's what the locals call it, don't you know - we stumbled across Sprinkles... my tastebuds have never been so spoiled! Sprinkles is the first, that's right the first, cupcake bakery that started the crazy cupcake revolution of the late naughties. Their maxi cupcakes are so light, so fluffy, so rich that our taste buds couldn't determine where the frosting ended and the cake started! As blissful as the moment was, I was also crushed as I knew I would never find such a delicious cupcake back home in Melbourne... that is until I found Cupcakes by Paolo! :D

Cupcakes by Paolo is located in West Footscray on the outskirts of Melbourne and believe you me, it's worth the trip! All cupcakes are baked daily, on the premises and are truly as close to Sprinkles as I've found so far... I hope they never franchise out!! If Sprinkles are 15/10 then Cupcakes by Paolo would be at least 12/10! The vanilla and fruity flavored cakes are so light, so fluffy, I've polished off 3 in one go... I was pregnant at the time! Whereas the chocolate cakes are the perfect balance of dense, rich and fluffiness in one perfectly frosted cake. Speaking of frosting, it's neither too sweet nor too buttery and it gorgeously adorned with pretty little gem.

You really can "Taste the LOVE"!!!


Flavors in the photo are: Pavlova Passion, Could Nine, Classic Vanilla, Very Berry Raspberry, Orange Jaffa and Oh So Velvet.


Tuesday, 20 March 2012

Mexiday! The basic ingredients

I am sooooo obsessed with REAL Mexican food at the moment! You may have realized this after reading my review of Mamasita a while back... still drooling! When I say REAL Mexican food, I'm not talking about heavy, fatty, dishes smothered in refried beans and melted cheese. I'm talking about beautiful, fresh dishes, full of flavor and a whole lot healthier then you might imagine.

So it only makes sense that I do a series of Mexican recipes but since the phrase "Taco Tuesday" is used everywhere... let's make today... Mexiday!! Hey, there has to be at least one tacky reference thrown in
:)

Firstly, you need to find a few ingredients for that authentic taste, such as:


Corn tortillas - the type you get at the supermarkets here in Australia are ok, but they aren't the greatest. If you can, try to find the frozen ones - you won't regret the effort! I get mine from here: http://www.aztecmexican.com.au/ they are in Victoria and are very helpful, so maybe give them a call and see if they know where you can find them in your area. I usually buy a box and stack my freezer full or share with a friend or two. FYI, there are two kinds of tortillas, one for heating and eating (soft taco style) and the others are thinner for baking like enchiladas. If you're really keen on cooking from scratch, you could buy a grain called masa harina (fairly easy to find) and make your own, but I haven't had much luck doing this. To heat the soft taco tortillas, just heat in a dry pan for about a minute each side and then wrap in paper towel and place inside a container with a lid, or a tortilla warmer. The steam from each tortilla will keep the rest warm and soft.

Chipotle chillies - these are my favorite chillies! It a smoked Jalapeno and is finally getting more popular in Australia. You can buy them as a powder, dried or canned, and has the most beautiful smokey heat. I wouldn't classify them as super hot, but start with a little and work your way up.
Herbies sell the powdered and dried variety and I get my cans from Aztec, but some specialty supermarkets also have them. You can use smoked paprika if you can't find chipotles, but it won't be the same.

Other Mexican chillies include Ancho, Mulato, Pasilla, and there's many more. Again, Herbies is a
great place to find these in the dried varieties. I suggest you get a few and see what you like, some are mild, some will burn your mouth, get a few and have a play.

There's a bunch of herbs and spices that you'll also need and if you've followed my herb and spice recommendations, you should already have most of what you need in your pantry. You're going to need coriander, both powdered and fresh... in fact, start growing it as you'll need handfuls in lots of dishes, especially salsa's. Cumin is a another must have as well as dried oregano and paprika.


And don't forget... Limes!! And plenty of them!


Lastly, grab a bottle of tequila... for marinating... and let's get cooking... hiccup!

Tuesday, 28 February 2012

Chocolate mousse... just add water?!

Where did February go?? Apologies, dear readers :( I've been so busy eating, I've neglected my blog... so to kick it back off, let's talk chocolate!

If you've ever worked with chocolate, you probably know that you should always melt chocolate using a double boiler and never let any of the water splash into the chocolate as the chocolate will 'seize' meaning it will go rock solid and you'll have to throw it out and start again. So imagine my surprise when I read that Uber Chef-slash-Scientist Heston Blumenthal has made chocolate mousse using chocolate... and water!! Insanity!!!

If you haven't heard of Heston, do a YouTube search as his creations are mind boggling... or sell a kidney and get a table at his very exclusive restaurant in the UK, the Fat Duck.

Ok, back to the crazy Chocolate water mousse.

Normally you would use eggs, sugar and heavy cream to make a beautiful thick mousse - that's a lot of effort and a fair bit of fatty-fat-fat! So you may think that this dessert will fall a little flat. (ah, a rhyme!)

Don't despair, the final creation is so extremely rich and dense, you'll only need a small pot - as you can see I've used espresso glasses. For another twist, you could use a little coffee or liqueur in place of some of the water. The only real rule is that you must use very good chocolate! Remember as the dessert is just chocolate and water, you are really going to taste the chocolate that you've used. Please, at least 70% cocoa solids! Lindt has some lovely dark chocolates on the market now as well as some beautiful flavors like blueberry, mint, chilli, etc.

Ingredients
- 130gr chocolate
- 1/2 c water (or 100ml water and 25ml coffee or liqueur)


How to...
- Get two mixing bowls, one smaller then the other so it can sit inside the larger bowl. 
- Half fill the larger bowl with lots of ice and a little cold water, then place the smaller bowl inside so that it's touching the ice.
- Break up the chocolate, place in a saucepan with the half cup of water and melt gently over a medium heat, stirring occasionally.
- Once the chocolate is melted, pour into the small mixing bowl that's sitting on the ice and whisk with an electric whisk for 2 to 3 minutes or until the mixture has thickened, it will turn a little pale. Be careful not to overwhip as the mixture will become grainy. But if you mess up, simply remelt the chocolate and start again.
SO fluffy!
- Spoon the mousse into your serving cups and refridgerate for 2-3 hours... you can eat it straight away but I prefer my mousse cold and loaded with fresh berries!

ENJOY!

Wednesday, 1 February 2012

Ricotta Doughnuts

Apparently, breast feeding mums crave sugar as we need the extra energy to nourish our little bubs... sounds like a good excuse for extra desserts to me!

Other then the fact that these doughnuts are deep fried, they aren't too bad for you and they are super quick to make! You get protein from the ricotta, there's not much flour so they are quite light and fluffy and the sugar is minimal too. These doughnuts aren't super sweet, but you won't stop at just one! And even better you can flavor them anyway you like to suit your tastes.
It's best to use fresh ricotta as its a much better product to work with, but I had a tub of super smooth ricotta in my freezer which I defrosted and the results were just as good. It just took a bit of extra flour.

Ingredients
- 250gr ricotta
- 1/4 c castor sugar
- 1 egg yolk
- 1/2 to 1 c self raising flour (it depends on the ricotta you use, you just want enough flour to make a wet, sticky dough)
Flavours
Nutty - add 1/4 cup of both pistachios and pine nuts, roughly chopped (this is what I've made in the photo)
Chocolate - add 1/2 cup chocolate chips and 1 tsp of vanilla
Citrus - add a tablespoon of finely grated zest of orange, lemon, lime or a combo of all
Or let me know your favorite flavor combo!

How to...

-
Fill a saucepan with enough vegetable oil to deep fry, about 4-5 cms deep and place over heat until hot. (I find a medium heat works best)
- In a mixing bowl, break up the ricotta with a fork to remove any large lumps.
- Add in the castor sugar, egg yolk, flavor of your choice and add just enough flour to make a sticky, wet dough.
- Using two tablespoons, carefully drop walnut size spoonfuls into the hot oil. If you haven't done this before it's easy! Just use one spoon to scoop up some of the dough and then use the other spoon to carefully push the dough into the hot oil. (I've tried to show you this in the photo below) Hold the spoon with the dough fairly close to the oil so it doesn't splash up and burn you!
- Fry a few at a time (don't over crowd the pot) for about 3-4 minutes. Don't forget to flip them over half way so they are golden on each side. They are cooked when you break one open and they are light and fluffy, not gooey.
- Once cooked, drain well on paper towel.
- I like to serve them dusted with icing sugar and a drizzle of honey, mmmmm!
- Makes about 12-15 doughnuts
Using 2 spoons to make the doughnut

Thursday, 26 January 2012

Cue the magic...

11 weeks ago, to the day, the most magical experience of my life occurred... I went from being a soon to be mum, to becoming a real life mum... for the first time... aaawwww!

I'm sure, for many women the thought of childbirth conjures up images of horror scenes from Hollywood movies showing women (with perfect makeup) sweating, hyperventilating and screaming things like "you did THIS TO ME!" or "GET OUT!!" or this hilarious scene from The Backup Plan. But for me, the experience was... magical. I can't think of a single better word to describe it. That's not to say it wasn't painful, it was, and at one point I did scream "get OUT" at my swollen belly... but somehow I still loved it :)

So here's a short account of my story... without the gore!

I had just posted up this entry and was chatting on the phone with my poor mum who had developed an awful cold and was sad that she probably wouldn't be able to hold bubs whenever she finally did decide to arrive. I was 11 days past my due date, very uncomfortable with huge sausage feet when I finally felt my first contraction at 11am. It was like an uncomfortable cramp, nothing too painful and I knew that I might not have another for an hour or so as is normal at the beginning of many labors, so I ignored it and kept chatting.

My next contraction came 5 minutes later... and 5 minutes after that... and 5 minutes after that! So I made an excuse to get off the phone and called the midwives who agreed it was time to go to the Birth Center. I called Mr Sabi and uttered two words "Home, NOW!" Thankfully he was just 10 minutes away, as by the time he got home my contractions had progressed to 3 minutes apart! So armed with towels, in case of a roadside emergency, I waddled to the car and we set off on our 25 minute drive to the hospital... which turned into a 50 minute drive thanks to darn roadworks!!

We had the wonderful experience of having a first year student midwife follow our pregnancy from start to finish - Miss Al. Poor Miss Al was having one of her final exams that day, but she met us at the hospital soon after. If she was still unsure whether she wanted to continue her career choice in midwifery, she would soon have all the experience needed to make that choice!

My labor continued to increase in intensity for several hours and after trying massage, having a shower, swaying to music and having a bath, the midwives suggested I try some oxygen. For me, this was a great choice. The oxygen just took the edge off the contraction and helped me relax a little more to let my body do its thing. It doesn't get into my, or the baby's blood stream, and as soon as you stop sucking on that magic pipe, the affects wear off... unfortunately!

Anyway, I promised to skip the gore, so let's summarize the next bit. Waters broke, meconium was present - this is bubs first poop - which meant I had to move out of the Birth Center into the main birthing suites of the hospital for monitoring. It's generally still safe to birth your baby, but the baby's heart rate needs to be monitored to ensure she doesn't get distressed. Once I was in my new room - 10 meters down the hallway - and the doctor checked "us" over, it was decided that it was time to push... which meant giving up the oxygen pipe! NOOOO!!! My wonderful midwife, Shari, pried the pipe from my hand and convinced me it was time and I needed to focus, so "no more gas now sweetie" she uttered soothingly, yet firmly, in her thick Eastern European accent.

Ninety minutes of pushing later, I looked up and noticed it was 11:50pm. If I could just hold on 10 more minutes, our daughter would have the coolest birthdate - 11/11/11! Yes, I promise the insane part of my brain actually thought of this and I could see that Mr Sabi and Miss Al were thinking the same thing... but 5 minutes, and a few squeals later, little Miss C was born!!

She was slippery and blue; fat and perfect, her big eyes looking up at me, curiously taking everything in. My birth experience was over! She was here, she was real! The tears and hugs flowed, but only for a brief moment.

Although my birth had virtually gone to plan, little Miss C had sucked in a lot of meconium and needed some help breathing so she was whisked away to NICU for assistance. I was devastated. Throughout my pregnancy I had prepared myself for all the possible birth situations: natural, assisted, epidurals, c-sections, whatever was needed to bring my baby into this world was fine with me, although natural was the preference. But I had never once thought that my baby would be born sick. It would be 5 stress filled days of breathing treatments, tests, infection spikes, almost no cuddles and even having to go home without her... a memory that still makes the tears flow. Some people were supportive, some not so much but the NICU Nurses always smiled and reassured us. There were so many truly sick babies in the NICU unit, some only half the size of our brave girl but all fighters. I pray that all those babies were able to go home with their families soon after us. 

Finally after 5 of the longest, tumultuous days of my life, we got the all clear from the doctor and it was time for the little family to go home!

It's been a fabulous journey so far. From time to time, I might even let you know what's happening. But let's not talk about poop! Why does everyone become so fascinated with poop once a baby is born?! It's really not that exciting...

Monday, 16 January 2012

"Sorry, I'm gluten intolerant..."

I bet if you went through your list of friends you could easily count half a dozen that are gluten intolerant. It’s such a common aliment these days. But don’t let it stop you inviting your closest friends over for dinner. (if you’re unfamiliar with gluten intolerance, check out Wikipedia for more info)

I am not a nutritionist or doctor and this list is by no means comprehensive, you should always double check all product labels (they change frequently) but here’s some pointers to help you out:

Stir-fry: steamed rice is always a good option but if you want to do a noodle dish grab some fresh rice noodles from the dairy case at the supermarket. I think they are even yummier then the wheat varieties and all you need to do is sit them in hot water for a few minutes, drain and add to your wok.

Cheese sauce: most of the time you would thicken a sauce with flour, but instead use cornflour. Most corn flours are gluten free (double check labels as some contain wheat) and in this case you can substitute your usual amount of plain flour for cornflour... you won’t even know the difference.

Pasta: there are lots of gluten free pasta’s available these days so find a variety that you like. Make a batch of cheese sauce and you could have mac and cheese or if you have some frozen Bolognese sauce, you could whip together a quick lasagne.

Corn tortillas and taco shells: Mexican style foods are always an easy option. So far all the taco shells I’ve found are gluten free but some tortillas are sneaking in wheat flour, so again, check the labels!

Crumbs: rice crumbs are easy to find in the health sections of most major supermarkets and are actually crunchier then bread crumbs, mmmm.

Dessert: go to the health section of your local supermarket and buy a gluten free cake mix! There are lots of recipes available but it can be very expensive to make a flourless cake as you need a lot of nut meal so this is the one time I'll let you cheat. Or your other options are something dairy based, like custard, ice-cream sundaes, crème caramels or mousse.

Hope that’s given you some ideas!