live life, celebrate food, share both with those you love

Tuesday, 15 November 2016

Breakfast, a go go!

Oh happy days! Today I share with you, my latest 'breakfast on the go' creation and I'm a little bit in love!

It takes about 2 minutes to make and you can easily make for one, or two, or more. Make 5 and you'll have a week's worth in your fridge ready to go!

As you can see in the pic, I've started mine as I wait for my morning train to work... and the suns finally out - happy dance!


Night before instructions:
- Grab a suitable jar or container with a lid, I use a glass mason jar
- Add 3-4 tablespoons of regular oats or quinoa flakes if you prefer
- Add 1 tablespoon of chia seeds and mix
- Pour in enough milk to cover (regular, almond, soy, etc) and stir really well so the chia doesn't clump. The mix should be milky and wet, the oats and chia will soak up the liquid as it sits.
- Cover and store in the fridge until needed, up to 5 days.

To serve:
- remove you lid and check the mix. If it looks to dry add another splash of milk and mix to loosen.
- add your toppings and ENJOY! Or pop the lid back on and race out the door.

Topping ideas:
- my favorite at the moment is homemade cashew butter, strawberry chia jam and coconut cream
- stewed apples, almonds and pepitas
- coconut cream, dried cranberries and cocoa nibs
- granola and coyo

What's your favorite? Share in the comments below!

Thursday, 7 July 2016

Little balls of BLISS!

Ahhhhhh bliss! It's such a simple, yet evocative word. And in this house we are crazy for Bliss Balls!


Essentially it's a snack sized ball of blitzed up ingredients which could include dried fruits, nuts, citrus zest, coconut, oats, nut butter, chocolate chips... You really are limited only by your willingness to experiment.

I usually whip up a few batches every other week, pop them in an airtight container and slide them straight into the freezer. It might sound odd but they never truly freeze rock solid. Little MissE (2yrs) is happy to grab one frozen and munch away. I even leave the boxes on a low shelf so the girls can reach a healthy snack for themselves.

Here's my top tips to whipping these up in a flash:
- most people use a food processor, but I don't have one. I use my Nutribullet 900 and it works a treat!
- if using a Nutribullet, try to pulse. I struggle with this so I make sure I'm paying attention or you'll get a weird mush
- always layer your ingredients, especially in a Nutribullet! Later fresh dates or dried fruit AWAY from the blades. The fruit gets to sticky and will clump. You want the dry  ingredients (nuts, oats, etc) to coat the blades and then it will draw in the fruit.
- I don't recommend using a blender :(
- always use fresh dates. Dried dates are too small and dehydrated for my recipes


Here's our 3 favorites!

1. Choc Oat (nut, dairy, gluten, refined sugar free)
6 fresh medjool dates
1/2 c oats
1 tbsp cocoa (or drinking chocolate, protein powder or cacao)
- remove seeds from dates, tear in half and add to the small Nutribullet cup.
- add in oats and cocoa (or your alternative powder
- screw on blade and pulse/ blitz until the mix is just starting to stick together
- tip into a bowl and scrunch with your hands, if you can squeeze a small amount into a firm ball, you're ready to roll. Or blitz again if too dry.
- roll the mixture into 12 walnut sized balls. Wet your hands if the mix is too sticky 
- place into a container and freeze (because of the oats I've found these never stick together)

2. Lemon balls (dairy, gluten, refined sugar free)
1 c raw unsalted cashews (or half cashew/macadamia)
3 fresh medjool dates (optional)
Zest of one lemon
Juice of half a lemon
1 tbsp coconut oil
Note: I add the dates to help the mix stick together but you can omit and blitz the nuts a little longer so that a little bit of nut butter starts to form. This will also help the mix bind
remove seeds from dates, tear in half and add to the small Nutribullet cup.
- add in lemon zest, lemon juice, coconut oil and nuts
- screw on blade and pulse/ blitz until the mix is just starting to stick together
- tip into a bowl and scrunch with your hands, if you can squeeze a small amount into a firm ball, you're ready to roll. Or blitz again if too dry.
- roll the mixture into 12 walnut sized balls
- as this mix is a little wetter, place the balls on a plate lined with baking paper and freeze until firm. Once firm, transfer to an airtight container and store in freezer.

3. Raw Cinnamon 'Donuts' (dairy, gluten, refined sugar free)
1/2 c raw unsalted cashews
1/2 c walnuts
3 fresh medjool dates (optional)
1/2 tsp (or more) cinnamon
1 tsp maple syrup or honey
Small handful choc chips
Note: I add the dates to help the mix stick together but you can omit and blitz the nuts a little longer so that a little bit of nut butter starts to form. This will also help the mix bind
- remove seeds from dates, tear in half and add to the small Nutribullet cup.
- add in nuts, cinnamon and maple syrup
- screw on blade and pulse/ blitz until the mix is just starting to stick together
- tip into a bowl and scrunch with your hands, if you can squeeze a small amount into a firm ball, you're ready to roll. Or blitz again if too dry.
- add choc chips, mix and roll into 12 walnut sized balls
- place into a container and freeze (these don't seem to stick together either)


Tuesday, 8 September 2015

RAW Salted "Fantales" - get in my belly now!

OH. WOW! I believe the only expression for these is... Totes amazeballs!

I've been fascinated by clean eating lately. As much as I love a good heavy meal, clean eating really speaks to me. I much prefer simple proteins and loads of veg on a day to day basis. Give me a bowl of brown rice and I'm like a pig in mud! Thinking back, I've been like this ever since I was a tiny kidlet.

I've been scouring the Internet for fun and interesting recipes and playing with some ideas of my own... And this was born!


Gluten free, sugar free, vegan and dairy free - depending on the chocolate you use.

Enjoy in moderation!

Ingredients for salted caramel
1 cup fresh dates, seeds removed
Big teaspoon of nut butter, I used cashew
Seriously good pinch of sea salt

Ingredients for choc coating
1/2 cup of broken chocolate pieces
1 teaspoon of coconut oil

Do it...
- Using a food processor or high powered blender, pulse the dates, nut butter and salt until smooth.
- Scrape the caramel onto a sheet of baking paper and place in freezer for around 10 minutes.
- Once chilled, wet your hands and roll the caramel into 20 balls. Pop back in the freezer to firm up.
- While waiting for the caramel balls to firm up, melt the chocolate and coconut oil. (20 second bursts in the microwave work best for me)
- Roll the balls in the melted chocolate (I found stabbing a caramel ball with a toothpick helpful for this step) and place the finished "Fantale" back on he baking paper to set.

I prefer these at room temp but they are still great straight from the fridge... Or even the freezer!

Tuesday, 30 June 2015

Strawberry chia jam - it's berrilicious!

Lately, everyone is jumping on the "sugar is evil" train. Whilst I agree for the most part, some sugar (ie: fruit) was put on this planet to be enjoyed! Moderation is my mantra.

In recent weeks, we've made the decision as a family to drastically lower our consumption of processed foods due to certain health issues. I'm not sure I'll ever be able to say goodbye to Nutella yet though... Yes I know I could make my own... Yes I know it's 50% sugar... But it's sooooo yummy!!!

Quite a few foods we used to eat, now either need to be tweaked or made from scratch. Thankfully I enjoy a good food challenge!

Challenge one - a spread for toast!

Commercial jam is basically sugar and wheat with a touch of fruit in it. Even making jam from scratch, will require an equal ratio of fruit to sugar. DaddyJ loves his strawberry jam on toast, so let's get this sorted asap.

Here's an easy 3 ingredient version which is fresh, fruity and full of goodness!

The only downside, it doesn't keep longer than a week (maybe two if your fridge is extra cold) and you can't can it like regular jam. But you can freeze it!

Most importantly, make sure you purchase the best, ripest, juiciest berries you can as all the flavor comes from the fruit.

You'll need...
500g strawberries, washed and stems removed (any berries will work)
Liquid sweetener of choice - agave, honey, maple syrup, etc.
2 tbsp white chia seeds

Make it!
- first, roughly chop the strawberries and be sure to get rid of any icky bits.
- heat the berries and the sweetener in a saucepan over medium heat. Start with a tablespoon or two of sweetener, you can add more at the end.
- gently mash with a fork or potato masher until you get it as smooth or as chunky as you like.
- once the mix is rich and gooey, take off the heat and stir in the chia. Be sure to mix thoroughly so the seeds don't clump.
- let the jam sit for 10 minutes then adjust the sweetness if needed.
- if you don't like the texture of the seeds, you can use a blender or food processor.
- pour into smallish jars and refrigerate or freeze... ENJOY!


Sunday, 5 April 2015

Gooey Choc Lava Cake

Need a reason to try this recipe? Watch the choc lava flow out of the centre...

Now that I have your attention, let's bake! You can get this on the table in 15 minutes, it's that easy!

Ingredients for 2 serves
50g quality chocolate - dark is preferred, around 70% is my favourite.
50g butter
50g plain flour
20g sugar
2 small eggs
Dash of vanilla
Pinch of salt

How to...
- Preheat your oven to 180 C.
- Grease 2 small ramekins or teacups and dust with cocoa powder. Tap out excess powder.
- Melt the butter and chocolate together. I use a microwave safe bowl, in 20 second bursts. Don't over heat.
- Mix in the salt, vanilla and sugar.
- Whisk the eggs in a separate bowl to combine.
- Mix the flour and eggs into the melted chocolate. It should be smooth, thick and glossy.
- Pour half the mixture into each ramekin and place the ramekins onto a plate - this makes it easier to get them in and out of the oven.
- Bake for 12 minutes. You really need to adjust the time for your oven, 1 minute too long and it won't ooze. The cakes are done when the edge is cooked but the centre still wobbles.
- Use a butter knife to loosen the edges and invert on a serving plate.
- Dust with icing sugar and don't forget the ice cream!

Saturday, 1 November 2014

Coconut Custard... My current obsession!

Wow! Over a year since my last post?! Say it ain't so... 

Since my last post I've:
- changed hairstyles
- travelled overseas
- experienced heartbreaking loss
- changed jobs
- made tons of silly decisions
- eaten tons of chocolate because of said silly decisions
- learnt to knit... much to hubby's dismay!
- and most importantly... Had another beautiful, amazing baby girl... Welcome MissE! Mama loves you!

Hmmm, guess I have been busy...

Ok, back to the important issues... FOOD!

Our family diet has switched gears for the next few weeks to Gluten Free. And honestly, it's a total pain in the butt... Yet somehow I'm enjoying it... Weirdo alert!

The sheer amount of intolerances and allergies out there is mind boggling. I know a lot of you are nodding your heads and I have a new found respect for you. I have planned every morsel that will enter our mouths for the next few weeks to ensure simplicity for all and no cheating. I cannot believe how many products contain hidden gluten, like our jar of strawberry jam in the fridge which contains wheat! Jam, in its purest form should be fruit, sugar and lemon juice - no wheat needed!!!

Let me re-iterate, unless you have a suspected or known gluten intolerance, you should not follow a gluten free diet. This is documented on all the official websites such as http://www.coeliac.org.au

There are no health benefits to following a gluten free diet (unless you have been diagnosed), you will not magically lose weight and research has proven you will do more harm then good to your body unless this diet is absolutely necessary.

Ok, ok, back to food!

Going gluten free can be hideously expensive so it's important to work with as much natural food as possible. Bearing this in mind, some of my recipes have been inspired by the Paleo diet, just because I love the minimal, natural ingredients.

Let's start with breakfast and my new obsession...  COCONUT CUSTARD!!!

Obsession is an understatement! I make s big batch of this every Sunday and have to stop myself from gobbling it the instant it's ready.

It's a very smooth, creamy custard with a mild taste of coconut. I'm using it instead of milk for cereal and making luscious breakfast trifles the night before. I always find it keeps me fuller for longer possibly due to the eggs.

Hope you enjoy as much as I do!

Ingredients
2 eggs
2 tbsp cornflour
1 tbsp sugar or agave syrup
1 can of coconut cream (mine are between 370-400ml depending on brand)
1 can of water (just fill the empty can)
1 tsp vanilla paste

Method
- Whisk the eggs, cornflour and sugar in a medium saucepan to make a smooth paste.
- Blend in the coconut cream and water. 
- Heat the custard on a medium low heat and stir slowly but constantly. You don't want it to stick and burn!
- After a few minutes the custard will thicken, don't let it boil but a bubble or two is fine.
- Turn off the heat and stir in the vanilla.
- Pour the custard into a container and place cling film directly on the surface of the custard. This will stop a skin from forming.
- Keep in the fridge for up to 3 days

Thursday, 15 August 2013

C is for cookie... Date and Walnut cookies to be exact!

It’s always been my opinion, that homes with kiddies should always smell like freshly baked cookies… yum! My mum baked cheesecakes, carrot cakes and chocolate cakes but I don’t really remember her as a cookie baker. Yet my fondest childhood memories come flooding back when I smell cookies baking in the oven… yeah, I’m weird, this is not news to me!

I’ve struggled for quite some time to find a cookie recipe that’s simple to make and also spreads well yet doesn’t over crisp.

Last night I had success!! So ladies, gents and kiddie-winkles, may I present… Date and Walnut cookies!

This recipe makes around 40 small cookies if you can keep husband/child/nonna from eating the raw cookie dough!


Ingredients
185g butter, at room temp
½ c caster sugar
2 tsp vanilla extract
1 egg yolk
1 ½ c self raising flour
½ tsp cinnamon
½ tsp nutmeg
100g chopped dates
½ c walnuts

How to...
- Preheat your oven to 180 degrees Celsius.
- Using electric beaters, beat the butter, sugar, vanilla and egg yolks for a few minutes until pale and fluffy.
- Add all the remaining ingredients and stir well. I found the mixture a little hard to mix, so with clean hands, I scrunched and squished the dough into submission.
- Roll teaspoons of the dough into balls and place on a lined baking tray, about 4cm apart as these cookies will spread.
- Bake for 12 minutes or until just golden.
- Leave the cookies on the hot tray for a few minutes to firm up before you transfer to a wire rack to cool.
- Once completely cooled store in an airtight container for 3 days or freeze for 1 month.


Monday, 3 June 2013

The healthiest Banana Cake recipe I can come up with!

As I mentioned in my last post, my poor little poppet has been sick for weeks. Fever, chills, a cold... all the wonderful lurgies of winter have hit her all at once.

Nobody wants to eat when they feel unwell and even though my little champ is a great eater, she's really struggling to eat much of anything at the moment.

But no one says 'no' to cake, right? :) So, I've come up with a 'cake' that I think you'll agree fits into the 'healthy' category. Stay with me, I promise it's not your usual fat and sugar laden style of cake... not that there's anything wrong with that, hahahaha!

Ingredients
1/4 c coconut oil - for good fats
1/4 cup vegetable oil - because too much coconut oil seems to dry out the batter
2 eggs - protein
2 very ripe bananas, mashed
200g plain Greek yoghurt - packed with protein
200g plain or wholemeal flour
1 tsp baking powder
1/4 c caster sugar - optional (my yoghurt is quite strong, and my bananas were a little under ripe so I needed a touch of sugar to balance out the flavor)

How to...
- Preheat your oven to 180 degrees C and grease a round cake pan with oil or butter. I recommend lining the base with baking paper as this does seem to stick a little.
- Mix all your wet ingredients in a small bowl (oils, eggs, mashed bananas and yogurt)
- In a larger bowl, mix your flour, baking powder and sugar, if you need it.
- Pour your wet mix into your dry mix and stir until combined. You don't want to over mix or it will become tough once cooked. Once you can't see any flour, then you are done.
- Pour your batter into your pre-greased pan and smooth out.
- Bake for approx 30 mins until golden brown and the top bounces back when you gently push with your fingertip.
- Leave to sit in the pan for a few minutes, then flip onto a wire rack to cool completely.

Note: feel free to use all vegetable oil or experiment with other neutral flavored oils. Or melted butter if you're feeling naughty!


$2 for a bag of bananas - bargain!

Wednesday, 29 May 2013

Let's make Chicken Stock - it's easy, I promise!

Pot full of goodness!
My poor little poppet has been sick for weeks... It's that time of year unfortunately... Silly winter! Plus she's 18 months old so her little body is trying to build up an immune system, not much fun for anyone.

As much as I believe in Western medicine (to a point...) I also believe in nourishing your body with quality food and plenty of rest when the evil lurgies come around to knock you on you bum. (can I say bum?)

This is why I've started making my own chicken stock, so that I can make my East Meets West Chicken Noodle Soup for my little MissC. We all know chicken noodle soup just seems to make us feel better. By making my own stock, I know that my little one is getting as many nutrients as possible and she seems to love the stuff. Even when she's feeling absolutely rotten, she'll happily drink some plain stock with a handful of soba noodles.

The thought of making my own stock always scared me. Surely it must be laborious and complex? But I swear, it's not! It's so simple and ridiculously easy to make, now I can't stop making it.

Ingredients
1 whole raw chicken, washed under cold running water (cut into pieces is fine but keep the bones in and the skin on)
1 large brown onion, skin on, ends cut off
1-2 heads of garlic, skin on, root cut off
2 carrots, cut in half
2 sticks of celery, cut in thirds
2 tomatoes, cut in half (Roma are preferred)
10 peppercorns
1 tsp salt flakes
5 springs parsley
Optional - Bay leaf or bouquet garni

How to...
- first you will need a BIG pot! Large enough to fit in all the ingredients and a few liters of water.
- next simply throw everything into the pot and add enough cold water to just cover.
- bring the stock to the boil, then turn down low to simmer for an hour. You may like to turn the chicken after half an hour if you are worried about part of it sticking out of the water.
- once the hour is up, carefully lift out the chicken onto a board using tongs. (we'll strip the meat later to make  my East Meets West Chicken Noodle Soup and Sour Cream Enchiladas)
- strain the vegetables out of the stock and discard. They've done their job, all their goodness is now in the beautiful golden liquor in front of you... So many possibilities!
- you will need to add salt at this point, probably up to 2 tsps. Don't be afraid of this, there's a lot of liquid so this will require a fair amount if salt. Add 1/2 tsp at a time and taste.
- you're done! This will keep in your fridge for about 3 days, or pop into individual containers/ziplock bags and store in your freezer up to 6 months.

Note:
- leave the lid off! If you put the lid on, your stock will be cloudy.
- a 'bouquet garni' is a little bunch of mixed fresh herbs which will infuse the stock whilst it's brewing. Feel free to make your own, or you can buy ready made options in the fresh herb section of your local supermarket.

Tuesday, 30 April 2013

Green frosting... yep, it's avocado!

Wow, it's been so long since my last post! Sorry everyone, tech issues over here :( did you miss me? I missed you!

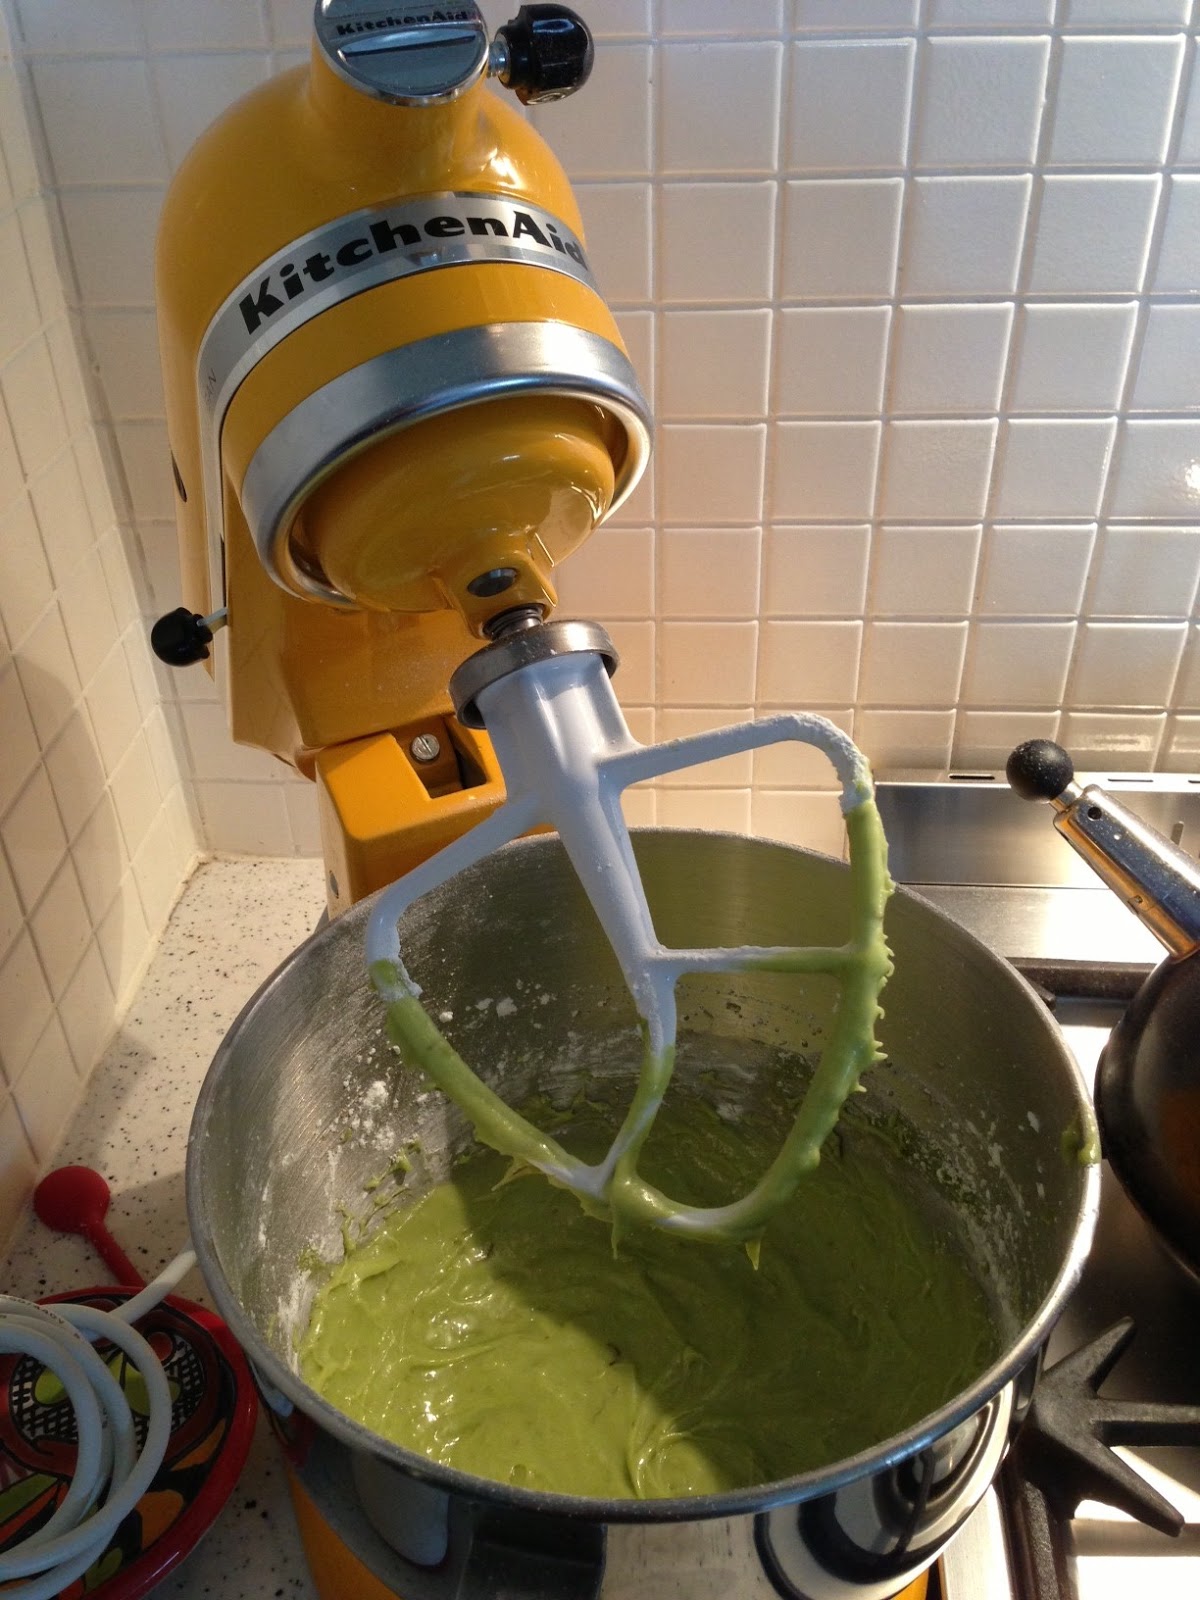
Just a short post today to finally reveal what the green goop was that I made in My shiny new toy!

It's avocado frosting! Don't leave, you know you're fascinated :)

I've been experimenting lately with vegan recipes, which has been lots of fun. I'm not into the vegan lifestyle myself, but some recipes are so interesting, I just can't resist. Also I have loads of friends who are dairy or egg free... it's crazy how many people have allergies these days!

This is a super quick and easy way to make frosting and it's the most fun brilliant green color. It does taste a little like avocado, but on a rich chocolate cupcake it really does work.

You can also easily add some cocoa and it becomes chocolate frosting - the kids will never know the difference! And they'll get a dose healthy fats, win, win!

Ingredients
2 ripe avocados
1 tsp vanilla extract
500g icing sugar (approx)

How to...
- Scoop the avocado flesh into the bowl of a cake mixer. Make sure to get rid of any brown spots.
- Add the vanilla and using a paddle attachment, beat the avocado until smooth, about 2 minutes.
- Slowly add the icing sugar until you get the desired consistency.

Note: the frosting will keep in the fridge for up to a week in an air tight container.

Friday, 8 February 2013

Mexi-Wars! Guzman y Gomez vs Mad Mex


You must know by now that I have a deep love for Mexican food! Need proof? Check out these posts: Andale, andale, arriba, arriba!, Mexiday! The basic ingredients, Mexiday! Orange and chipotle chicken tacos

Mexican cuisine has been so poorly misrepresented in Australia there should, in my opinion, be legal consequences against some ‘Mexican’ chain restaurants when they are clearly Tex-Mex, NOT Mexican! Ok, so maybe legal consequences is taking it a little far, but let me clarify that I have nothing against Tex-Mex. I lived is the Great Lone State, on and off for a few years and a little piece of my heart will always yearn for Texas. But basically, Tex-Mex is smothered in melted cheese and almost always served with a side of refried beans… YUM!

However, In my travels to Mexico and California, I’ve found that whilst refried beans do appear on many menus, the Mexican cuisine is much fresher and tastier. Fried prawn tacos, slow cooked pulled pork enchiladas, spicy bbq steak… sorry, I’m drooling on my keyboard!

Well, finally we have some great options coming to town, and two of my favourite food court options are Guzman y Gomez and Mad Mex – both great options but for different reasons. I’ve heard both have been compared to another American chain called Chipotle, one of my all time favourite cheap eats! But I must say, both GyG and MM fall slightly short of these lofty heights. If only I could combine the two… 

They both have very similar menu options: Burritos, Nachos, Quesdillas, Tacos, etc. The main differences being:

Some like it hot! GyG Quesdilla
GyG – The meat options here are definitely tastier and come in spicy or non-spicy versions. Spicy pork for me please! And whilst you can make a few changes, like swapping white rice for brown, the menu options come as stated. So if it says it has pico de gallo, that’s what you get. I’m sure you could make further alterations, but I doubt it’s encouraged. The other thing I love about GyG is the free condiment bar where you can choose from 3 types of Tabasco (regular, green or chipotle) and fresh coriander, red onion and pickled jalapeños. This is what brings me back to GyG!

Little snack today, Kids Nachos from Mad Mex
Mad Mex – this is much more like the Chipotle franchise because you can customise your meal the way you like it. You first choose your meat filling – barbacoa for me please! – then there’s 4 salsas, sour cream, queso, beans, cheese, lettuce, guac, etc. I love coming to Mad Mex for their salsas! Different meats need different salsas and sometimes I want to burn my taste buds off and sometimes I don’t.

So… which will you choose? ;)

Friday, 1 February 2013

My shiny new toy!

Isn't she pretty! Yes, I know I technically asked a question, but it's way more of a statement, so I will stand by my gramatically incorrect exclamation point, instead of a question mark!

Mr B and I recently celebrated our 10th wedding anniversary... we can't believe how much time has flown past! We always try to give each other a little something on this important day, but both of us pulled out the big guns, this year... really BIG guns! There was a simply divine visit to Vue De Monde, I'll be sure to blog about that once I've finished digesting the 17 courses :) I gave Mr B a fabulous BBQ just in time for summer... but it's a built in, so hopefully it'll be installed before next summer - didn't think that through, did I?

I thought I might get an iPad. Those who know me well would probably think it an appropriate present. Instead, I was presented with a simply gorgeous ring... ok, I picked it, but he surprised me by taking me shopping!

And then the piece de resistance... my very own, shiny, brand new KITCHEN AID ARTISAN MIXER!!!!!!!!! (enough exclamation points? I'm not sure if you understand the excitement!)

I have coveted one of these work horses for years. I almost purchased one the year we lived in San Francisco, but I knew I wouldn't be able to bring it back home - stupid voltage conversion. I simply couldn't bring myself to buy one here in Oz, as the price was always ridiculous! When the US dollar was at its peak, these mixers cost $900, sometimes more, insanity!

We finally saw one at a much more reasonable price and although I was adamant that I already had a mixer (Breville) and didn't need this, Mr B put his foot down and insisted. Isn't he a dreamboat? ;)

My next dilemma... which color? There were 13 on offer! The safe part of me wanted the Gun Metal Grey, the only mixer in a beautiful matt finish. It's dark and broody... ha, it's me, to a tee! But this is Kitchen Aid and I just had to get a color. So after a frantic phone call to my sister - who lives in Dallas, Texas - I decided on Yellow Pepper... and I heart her!
Can you guess what I'm making? Bet you can't!

Tuesday, 15 January 2013

Mini Banana+Date muffins… no added sugar!


MissC chomping on a muffin in her trike

How yummy are muffins?! Ok, so we know they are not great for the waist line, but darn it they are tasty!

I’ve always had a good relationship with food. I enjoy it and most of the time I don’t feel guilty! But since my little one started eating, I’ve started to look at food slightly differently. I still enjoy it, but I want to improve the nutrition/quality these days. You’d be surprised how many times I’ve removed half the sugar or butter/oil and you can’t taste the difference.

Here’s a great recipe for little tummies and it’s sugar free but still super sweet. The sweetness comes from the overripe bananas and the dates. You could skip the dates, but remember this is extra fibre which is an added bonus in most diets these days.

Ingredients
1 c self raising flour (white or wholemeal, whichever you prefer)
½ tsp cinnamon
5 dates, seeds removed and chopped into small pieces
3 overipe bananas, mashed
50g butter, melted
2 eggs, beaten
¼ c milk

How to...
- Preheat your oven to 190 degrees C.
- Grease 2 x mini muffin pans or line with paper cases. (I prefer to grease so little ones don’t have to mess with paper cases, plus better for environment, right?)
- Grab a mixing bowl and mix together your flour, cinnamon and dates.
- In another bowl, squash your bananas so that they are mushy. Then add your milk, butter and eggs and stir well.
- Add your banana mix to the flour mix and stir until just combined. If you over stir your muffins will be chewy, you have been warned!
- Drop tablespoons of the batter into your muffin trays.
- Bake for 12-15 minutes, until slightly golden.
- Allow to cool on a wire rack before gobbling these down with a glass of cold milk! Mmmmm!